# Tắt GPU
Vậy nếu bạn cần tắt GPU không được hỗ trợ của bạn? Well đối với OpenCore thì cách làm có thể hơi khác, specifically that we need to specify to which exact device we want to spoof. Hiện tại có 3 phương pháp để tắt GPU:
- Boot Flag
- Tắt tất cả GPU ngoại trừ iGPU
- DeviceProperties
- Disables GPU on a per-slot basis
- SSDT
- Disables GPU on a per-slot basis
CSM cân phải được tắt trong BIOS để nó có thể hoạt động đúng cách, đặc biệt trên hệ thống dựa trên CPU AMD CPU.
# Boot Flag
Đây là cách dễ nhất, tất cả những gì bạn cần làm là thêm dòng sau vào boot-arg:
-wegnoegpu
Chú ý rằng phương pháp này sẽ tắt tất cả GPU ngoại trừ iGPU.
# DeviceProperties Method
Here is quite simple, find the PCI route with gfxutil (opens new window) and then create a new DeviceProperties section with your spoof:
path/to/gfxutil -f GFX0
And the output will result in something similar:
DevicePath = PciRoot(0x0)/Pci(0x1,0x0)/Pci(0x0,0x0)/Pci(0x0,0x0)/Pci(0x0,0x0)
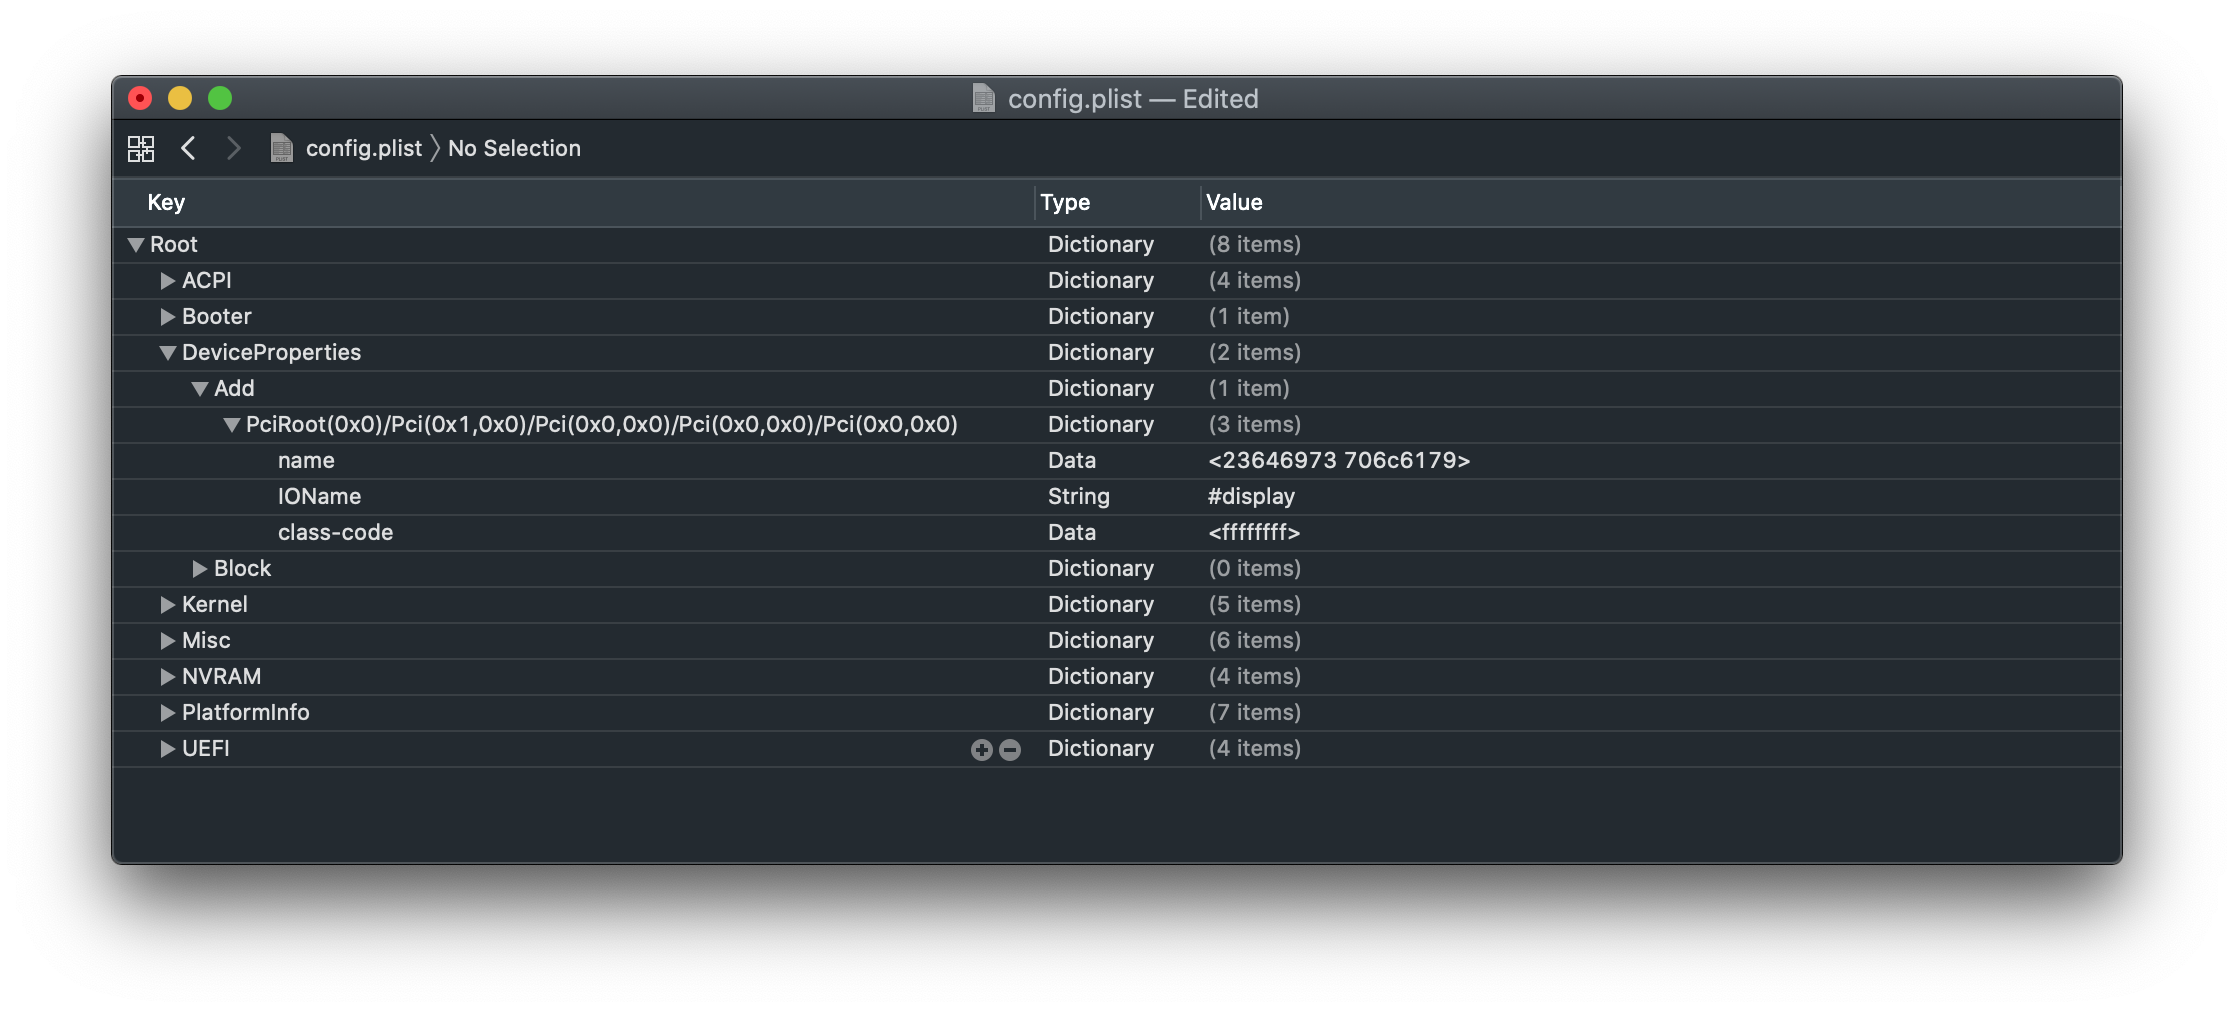
With this, navigate towards Root -> DeviceProperties -> Add and add your PCI route with the following properties:
| Key | Type | Value |
|---|---|---|
| name | data | 23646973706C6179 |
| IOName | string | #display |
| class-code | data | FFFFFFFF |
# SSDT Method
There are many ways to find the path but generally, the easiest way is to get into Device Manager under windows and find the PCI path.
Example of device path for \_SB.PCI0.PEG0.PEGP:
    DefinitionBlock ("", "SSDT", 2, "DRTNIA", "spoof", 0x00000000)
    {
       External (_SB_.PCI0.PEG0.PEGP, DeviceObj)

       Method (_SB.PCI0.PEG0.PEGP._DSM, 4, NotSerialized)
       {
          If ((!Arg2 || !(_OSI ("Darwin"))))
          {
             Return (Buffer (One)
             {
                0x03
             })
          }

          Return (Package (0x0A)
          {
             "name",
             Buffer (0x09)
             {
                "#display"
             },

             "IOName",
             "#display",
             "class-code",
             Buffer (0x04)
             {
                0xFF, 0xFF, 0xFF, 0xFF
             },
          })
       }
    }
A copy of this SSDT can be found here: Spoof-SSDT.dsl (opens new window). You will need MaciASL (opens new window) to compile this. Remember that .aml is assembled and .dsl is source code. You can compile with MaciASL by selecting File -> Save As -> ACPI Machine Language.
Source: CorpNewt
# Windows GPU Selection
Depending on your setup, you may find that Windows renders games or applications using an undesired GPU.
Many users only have two GPUs. Nvidia and the Intel HD/UHD IGPU. Since Nvidia no longer works on macOS, they may have the monitor plugged into the motherboards HDMI/DP connection for convenience. As a result, Windows will render all games and applications through the IGPU. You can reroute a specific game or application to a different GPU by going to: Settings > System > Display > Graphics settings
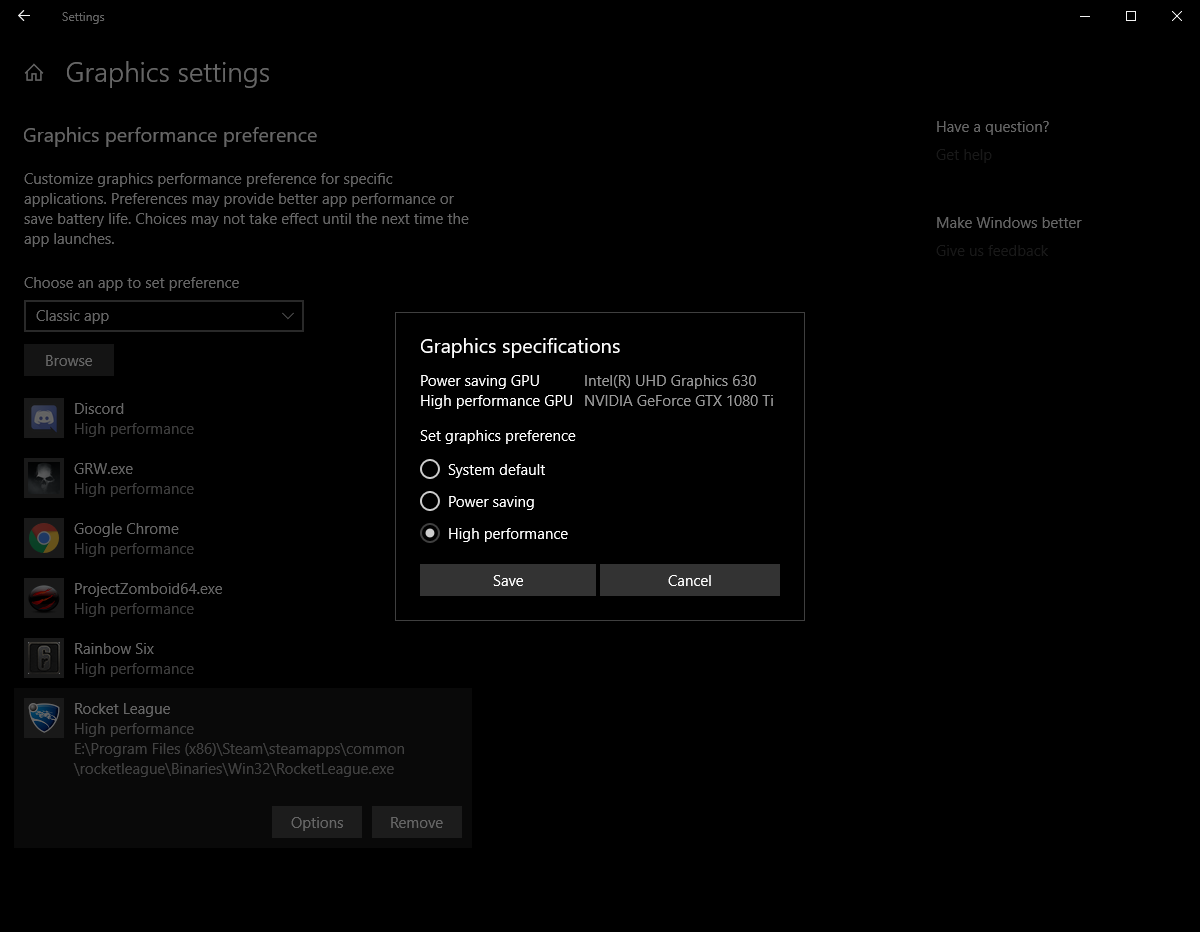
The rendered game or application will have its buffer copied to the IGPU. Which is then displayed to you. This does come with a few downsides:
- GSync will no longer work.
- Nvidia settings can no longer be opened. This requires the display to be connected to the GPU
- Decreased frame rate.
- Increased input latency.
- Refresh rate cap.
If your motherboard only has an HDMI connector for the IGPU, the maximum refresh rate for spec 2.1 is 120Hz (opens new window). This assumes your board and monitor are of the same spec. This means your 144Hz monitor is only seeing a maximum of 120Hz as determined by the hardware. This limitation does not apply if your board has a DP connector for the IGPU.
If you have more than two GPUs (AMD, Nvidia and Intel), this setting is limited. A monitor connected to the AMD GPU means Windows will only allow you to select the AMD GPU or the Intel IGPU. The Nvidia GPU will not show. In a future version of Windows, this limitation is removed (opens new window).
As a recommendation, if you use both operating systems equally and prefer no downsides, your best option is an HDMI or DP switch.